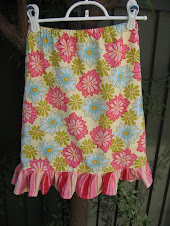
I know you don't know this... but I'm pregnant. And being pregnant has created an aversion to crafting/sewing. Tragic, I know, but I'm hoping to get over it soon. I'm nearing 12 weeks and need to make Christmas PJs, and a couple other things and I need the energy to do it! I've done all I can to avoid making things for anyone this year. I realize how un-crafty, not handmade revolution blah blah blah that is.... but whatever... I feel like barfing all day and just want to go to sleep.
On a less barfy note...
At church I am essentially the party planner for the women. We had a nice dinner the other night and then did a simple craft that I know you've all seen before. Mostly I wanted to just give you the link to where you can buy the supplies and see the tutorial I originally got the idea from. I realize my picture isn't really a great representation of how cute these actually are, but... it's just the one I made. The women at the party made darling ones though! The necklaces only cost $2 each to make (that was tile, bail, and chain) and were easy peasy. If you can glue one thing to another, you can do this. I'm all about the thoughtfulness of giving gifts, but I also don't have a lot of money to spend on them. The great thing is that the necklaces span all age ranges... so I'd like to think my 5 year old will love this necklace with the pic of her and her cousin, but a teacher would love it too with cute scrapbook paper behind it or something.
Here's the tutorial for the necklaces.
Here's the etsy shop I bought all of the supplies from.
Sunday, December 6, 2009
Thursday, November 12, 2009
bacon makes stuff taste goooood
We're still here. Sick kids for me. Also, getting ready for a craft fair. But here. I'm sort of nervous about the craft thing. It's like a REAL craft fair. It's at a swanky gallery in a nicer part of the East Bay. The only craft fairs I've done have been neighborhood ones where I'm set up next to the Avon lady and am pretty much the only one that's made anything by hand... wish me luck...
So I made this tonight for dinner and thought I'd share it with you. If anyone is still around. Otherwise, hey T, look what I made for dinner:
6 slices bacon (I used a whole package)
1 cup chopped onion
1/2 diced celery
1 quart chicken broth (4 cups)
1 bay leaf
2 tsp salt
1/2 tsp pepper
1/2 tbs thyme
2 cups peeled diced potatoes
1 10 oz. box frozen cut asparagus (I used fresh actually)
1 cup heavy cream (I used half and half)
Cook bacon until crisp in a 3 quart soup pot. Remove bacon reserving 2 tbs drippings. Crumble bacon. Cook onion and celery in drippings until tender. Add broth, bay leaf, salt, pepper, thyme, and potatoes. Cook until potatoes are soft. Once they are soft, mash the potatoes with a potato masher (loosely - not to a pulp). Add asparagus; simmer for 5 minutes. reduce heat to low, stir in cream and bacon. Simmer for 3 minutes (don't let boil).
So good my 5 year old will even eat it... at least the bacon part...
So I made this tonight for dinner and thought I'd share it with you. If anyone is still around. Otherwise, hey T, look what I made for dinner:
Potato and Asparagus Bisque
6 slices bacon (I used a whole package)
1 cup chopped onion
1/2 diced celery
1 quart chicken broth (4 cups)
1 bay leaf
2 tsp salt
1/2 tsp pepper
1/2 tbs thyme
2 cups peeled diced potatoes
1 10 oz. box frozen cut asparagus (I used fresh actually)
1 cup heavy cream (I used half and half)
Cook bacon until crisp in a 3 quart soup pot. Remove bacon reserving 2 tbs drippings. Crumble bacon. Cook onion and celery in drippings until tender. Add broth, bay leaf, salt, pepper, thyme, and potatoes. Cook until potatoes are soft. Once they are soft, mash the potatoes with a potato masher (loosely - not to a pulp). Add asparagus; simmer for 5 minutes. reduce heat to low, stir in cream and bacon. Simmer for 3 minutes (don't let boil).
So good my 5 year old will even eat it... at least the bacon part...
Tuesday, October 20, 2009
this years costumes
Mostly the Halloween costumes are finished. I mean, there are extra things - like a fancy tiara/headband for the ballerina and maybe some red-checked table cloth pants for the pizza, but then again... this may be it. For whatever reason it's impossible for me to work on a project for more than a few sittings before I get burnt out (this is why I don't make quilts). This happens with Halloween for me every year. So excited October 1st. So done by October 20th. Maybe I'm just tired tonight and the task of embellishing seems daunting.
The tutu I think is to big - width wise. It hangs a little too much. If I made it shorter it would have stuck out in more pancake tutu fashion. It's still really cute in person though. If you make one just know that a lot of patience is required - 7 layers of gathered tulle. 7.
The leotard was a little refashioned fun. A friend of mine who does embroidery professionally gave me a couple of leotards and a skort that she had messed up on and ripped holes in while trying to unpick. Hence, the reversed applique heart to get rid of holes. And since it's Halloween and a little cooler in the evening I cut up the skort and made sleeves for the tank top leotard. I felt myself quite clever.
This was fun to make. Hot glue is my friend. It took a while, but thanks to an entire weekend dedicated to church on the radio I was able to finish it. It stays on for about 5 minutes max. I guess that's all I can expect from a 2 year old. Maybe I should have just bought a spiderman costume?
I think THIS is the funniest costume ever though!
Monday, October 5, 2009
scrappy abc's
I came across this tutorial the other day for quilted letters. I thought I'd make letters for my son for a Christmas gift. I think they turned out cute and it gave me a chance to use my new darning foot, which I paid $1 at Joanns fabrics. I'm certain it isn't generic enough for MY machine since I have to rig it up with an elastic band... (I think if you enlarge the picture you can see some of the crazy quilting - like on the "U".) It's fun to use, but would take a lot of practice/patience if I wanted to use on something that was for someone who might notice all of the mistakes.
This project kind of takes a while, but is something easy to do whenever you have a spare minute.
and
It doesn't make noise + No batteries required +Can be thrown in the washer + Great use of scrap fabric = great gift!
Wednesday, September 23, 2009
an apple a day...
I'm always amazed that you can actually make the treats that you see in the cute little sweet shops. Who doesn't love their apples smothered in caramel and chocolate??
While at Target I walked past a bag of Caramels. I figured I give the caramel apple a shot. I've made them with Tracy before. Ok. I watched while she made them the not-cheating way (involving a candy thermometer) and then I ate it. I was there more as moral support.
Anyway, I bought the bag of caramels thinking it would be a fun family activity. Well, it turns out - it's even fun when you're just making one. All you need is (for 1):
9 caramel squares
1/2 tbs water
melt in a small saucepan on low. Stir continuously.
Stick your Popsicle stick into the apple. Dip the apple in the caramel. You may have to roll it since you're not melting enough to technically "dip".
**don't refrigerate. It makes the caramel HARD.
Then. I melted chocolate chips in the microwave. Unless you know how to do this, Google it. It's not hard, but there is a way to make it smooth and dip-able.
Add nuts. Or candy. Or more chocolate. Or crushed pretzels. The possibilities are endless.
Wouldn't this be a fun gift for teachers? Neighbors? Co-workers? Cellophane, cute ribbon and tags? The holidays, they are a-comin'.
Now, if only I could talk him into EATING the apple and not just lick off the toppings...
Sunday, September 20, 2009
canning: don't be scared
A lady at church gave me a ton of apples that she got from her sister who works for an orchard. Apparently these apples are considered "seconds" because they are not perfectly shaped and may have a bruise or two.Sweet.
100 apples.
But besides applesauce what can you do with apples??
How about APPLE PIE FILLING!!
Again, Sweet.
We are fans of apple pie, but I rarely make it because that whole apple part is a pain in the rear.
Now, I have 12 jars full of apple pie filling. Mmmmm.... The jar is just the right size to fill one pie, so now I just have to make the crust.
But, when you have 100 apples to peel, you MUST have one of these:It's an apple/corer/peeler. It's the coolest. I peeled 100 apples and was amazed every time. I even took it into my daughters Kindergarten class to show the kids since they are learning about apples right now. Amazement all around. (but mostly by me I think because I realize what a pain it is to do it the other way...)My BIL's (not) girlfriend took this picture. I'm pretty sure she thinks I'm the biggest dork ever.
You should can apple pie filling. Really, it's easy. And what a fun teacher/neighbor/whoever gift. Fun fabric on top, a label with directions on how to make pie crust and there ya go. Gift.
Here's the recipe I used: (fills 7 Qt jars) -I think 5 apples per jar was what it ended up being.
*(approx) 20 cups of apples peeled, cored and sliced (about 5 apples makes 3 cups).
slice and leave in a bowl of lemon juice
combine in a large pan:
*4 cups sugar
*1 cup cornstarch
*3 tsp cinnamon
*1 tsp nutmeg
*1 tsp salt
*10 cups water
cook on medium until thick and darkish brown. Stir, but not constantly. When it's thick, add 3 tbs lemon juice.
Fill canning jars 1/3 full of sauce. Put drained apples into jars smooshing down into the sauce until the jar is full. Use the handle of a large spoon to clear out the bubbles and spaces. Cover with hot lids and process in boiling water for 20 minutes.
Here's some info on canning if you've never done it before.
Wednesday, September 16, 2009
simplicity 2628
I vowed earlier to never sew patterns by Simplicity/Mccalls/Butterrick ever again. They just never turn out right. Well... I lied. I thought this shirt looked like it had potential. And after realistically choosing the right size for my 5 year old (size 3), it turned out alright. I chose fabric that I wouldn't mourn the loss of if the shirt didn't turn out right. I have a thing for corduroy and found this print at Joann's Farics a few years ago (bottom floral). It's all a little 70's prairie looking, but the actual shirt turned out cute, and I think I'll make it again with fabric I love.
Once again, the pattern calls for a zipper up the back. I think that zippers in shirts are weird, so I sewed up to the back leaving an opening. The neck is finished off with bias tape, so I just extended that for a tie. Gotta have a matching head band. BTW - this tutorial for headbands is SO easy! It literally only takes 10 minutes to make start to finish. It would be a great project if you're teaching your child to sew and makes awesome gifts! Add a little flower some buttons, ribbon, rick rack - the possibilities are endless. Plus - the way it's made even I could wear this headband it will stretch out that far.
The verdict: easy pattern. Great for beginners. If I would have made her "size" it would have been huge - so watch that. I'll be making it again I think...
I always wish there were more pictures when people review patterns, so here's some just in case you feel the same way.
Labels:
others tutorials,
pattern review,
sewing,
sewing with kids
Thursday, September 10, 2009
the only way to make pizza
Toppings L-R: green onions, green peppers, tomatoes, chicken and pepperoni, mushrooms, homemade pesto (best part!).
My husband works really late every Tuesday night, so I make pizza for dinner. He hates pizza... I know! Who hates pizza?! That's why Tuesday night=pizza night.I on the other hand *heart* pizza. I think I could eat it every day. Seriously. This is my favorite commercial. Every time I make pizza I totally admit to singing this song.
In my opinion - the ONLY way to make homemade pizza is on the GRILL. Oh it's so tasty! And so trial-and-error to get it right. But I've figured out what works for me. Tracy does it differently. I used to do it the way she does, but I am lazy.
Option 1: Tracy's way: she gets her grill REALLY hot and then puts the pizza dough directly on the grill. Then puts the toppings on. It's too hot for me. I don't like leaning over the grill that much when it's already 106 degrees outside. But, the flavor is a little different then the other options. Very tasty.
Option 2: use a pizza stone on your grill heated up to 500 degrees. I don't have a pizza stone. I think this is technically how it's "supposed" to be done. But whatevs.
Option 3: buy cheap pizza pans from the dollar store (since they'll get trashed by the grill). Make your pizza on the pans - toppings and all.
Remember to spray the pans w/ non-stick cooking spray.
Have your grill heating while doing all of this then turn it on LOW-MED (this is the trial-and-error part), put your pizza on, and check after 6-8 minutes. Possibly rotate if not ready yet.
Enjoy! I love to put fresh Parmesan cheese on it too!
I modified a recipe for the dough, so I'll share it with you.
2 tsp active dry yeast
1 tsp sugar
1 1/4 cup warm water
mix together and let stand until foamy
3 1/3 cup all purpose flour
1 1/2 tps salt
3 tsp olive oil
mix these ingredients and then add the yeast/water mixture.
cover and let rise. *this is KEY*
This makes enough for 2-3 pizza depending on how thick you make the crust.
*When I roll out my dough I like to brush olive oil on the surface before I put on my toppings* Don't forget to sing ;)
also - this is so easy to make the day ahead and refrigerate. Pull it out to warm up the dough and it's ready. I usually freeze my left over dough too. I almost think the defrosted dough is better than the fresh stuff.
The recipe is good in that Artisan Bread book too, but I like to make mine in my food processor, and the recipe in the book makes too much to fit.
Sunday, August 30, 2009
wedding gift
Friday, August 21, 2009
baby gifts
I originally bought this fabric in hopes to redo my kids (shared) bedroom. Anna's side would be super girlie and feminine in turquoise and red and Carson's side would be simple and straight-lined in grey/turquoise and red rocket fabric. Well, my husband's car had other ideas in mind for our money. So, game off. But I still have this lovely fabric. I'm sure you'll see an outfit for Anna in the future, but I HAD to use it now. It was burning a hole in my sewing cabinet so-to-speak. My good friend from High School is embarking on the grand adventure of motherhood and is having a baby girl. I've been trying to decide what to make her, but it seems that bibs are my old stand-by. I love to make them. They are so easy and fun. If you need a pattern, I posted one here.
I've made the bibs a lot. I like to back them in terry cloth - if you use terry cloth beware that it stretches so sew it on with the terry cloth against the presser foot and the pretty fabric against the feed dogs (does that make sense??) Anyway, I've tried sewing on velcro, buttons, and snaps. My final verdict on the closure is BUTTONS. It can't be pulled off, it doesn't stick to other clothes in the dryer, and I've heard that the snaps fell off of some bibs I gave a friend a while ago. Plus, buttons are always a fun detail and it's good practice making button holes.
Thursday, August 20, 2009
Tuesday, August 18, 2009
available again
Someone never paid for their fabric, so it's still up for grabs if anyone is interested...
Sunday, August 16, 2009
am i a crazy person??
Am I crazy person because I'm already thinking about Halloween?? I do this every year. I get all excited about Halloween in the middle of August and then by the time Halloween actually comes I'm ready for Christmas. I guess that qualifies as crazy. Anyhew... I found instructions on how to make this pancake-style tutu over at Burdastyle. What little girl hasn't wanted to wear one of these!? Bring on the tulle!
Thursday, August 13, 2009
School Girl
My daughter started Kindergarten yesterday. Of course she had to have a new outfit since all of life's major events require new outfits.
This is the (slightly revised) Oliver +S Sailboat Top and Skirt. I originally bought this pattern to make the cute little Capri pants version (here), but having taken an inventory of my daughters clothes she definitely does not need pants. Plus, it's still 98 degrees here.
I have to admit that I rarely really like the things that I make. I just wonder if I'd actually buy them if I saw them in the store - but I have to admit, I'm really happy with this little outfit. Something about red and white just makes me smile! The pattern is really easy to follow and, of course, fun to make. I always enjoy sewing from this company. The fit is always great and I always learn something new. Plus their patterns are classic and traditional.
I made the following changes:
*I used 7/8" buttons (calls for 5/8") for the skirt
*Instead of long sleeves I just used bias tape to finish off the edges for a more summer-y version.
*Added a ribbon sash - the shirt is a little boxy, which is understandable since it's designed for boys and girls. I thought the sash would add a little shape and fun.
*Used a basic running stitch with embroidery floss to outline the skirt. If you are a beginning sewer I totally recommend this pattern if you're wanting to sew for your kids. I always find buttons a little tricky (mostly the getting them even part), but pull out your manual and figure it out. Don't let buttons scare you away from making cute things. You can unpick them just like you can anything else (unless you've already cut the slit... then you're in trouble).
This outfit (sort of) completes the "spring collection", although it's not technically stated - I used the intended pattern just a little differently. Stay tuned for the Fall/Winter collection. It will mostly consist of shirts, a dress, and possibly a coat considering Anna has 5 pairs of jean, 7 pairs of Capri pants, 4 skirts... this girl does NOT need more clothes. I on the other hand...
Wednesday, August 5, 2009
seeing red
We were out of town for a week and had a bunch of tomatoes waiting for us when we returned. No one except for me likes tomatoes in my family, but they all love salsa. I like to make it and then freeze it in baggies. My recipe is not an exact science but more to taste... but I'll share the basic idea.
*A bunch of tomatoes. 8-ish I guess. Cut up and reserve a couple for the end so you can have chunky salsa.
*1 Jalapeno pepper
*1/2 red onion
*1/2 clove garlic
*salt and pepper
*cilantro (I don't add this, but I think most people would like it with some).
puree all together.
I do have a question for Tracy though - how do you thicken it? For example, when it's refrigerated the liquid separates from the rest. I just shake it up and it's fine again, but should I add something else to it?
Saturday, July 25, 2009
there's more where that came from
Ok... here's my final list for destash. As a reminder, here's the deal:
*pay via paypal
*prices are fab - so you have to pay the paypal fees ($.30 +3%)
*priority shipping (flat rate): ranges $4.95-$13.95 US prices depending on how much fabric you get. I can probably get 5 yards of the home dec stuff in the $4.95 envelope)
**let me know your zip code when you comment/email me**
*I'm happy to ship internationally, you just have to pay for it. You can see prices here.
*Please pay within 24 hours from when I contact you. After that I'll put it up again.
*To "order" post a comment or send me an email at lizandrobreese at yahoo dot com.
Okay...
Here's everything. The price is $7 per yard (so cheap you could probably buy it and sell it on etsy for $12/yd ... I'm just not that patient.)
I tried to put links with all of the fabric so you could get inspired.
Tiles Flax: 2 yards available SOLDModern Bud flax: 3 yards available SOLDOrchid Raspberry: 3 yards available **SOLD**
Orchid Celery: 1 yards available SOLD
**btw: the cheapest I found any of this online while searching for links was $9.90 a yard (and that was for the Ritzy stuff)
*pay via paypal
*prices are fab - so you have to pay the paypal fees ($.30 +3%)
*priority shipping (flat rate): ranges $4.95-$13.95 US prices depending on how much fabric you get. I can probably get 5 yards of the home dec stuff in the $4.95 envelope)
**let me know your zip code when you comment/email me**
*I'm happy to ship internationally, you just have to pay for it. You can see prices here.
*Please pay within 24 hours from when I contact you. After that I'll put it up again.
*To "order" post a comment or send me an email at lizandrobreese at yahoo dot com.
Okay...
Here's everything. The price is $7 per yard (so cheap you could probably buy it and sell it on etsy for $12/yd ... I'm just not that patient.)
I tried to put links with all of the fabric so you could get inspired.
Amy Butler Nigella Home Dec weight fabric. Cotton Sateen. 54" wide. Great for bags and such!Woodfern Brick: 2 yards available SOLDWoodfern Green: 2 yards available SOLDPassion vine River: 4 yards available SOLDRitzy Stripe Sky: 2 yards available Passion Vine Grey: 2 yards available SOLD
The next bunch are all Joel Dewberry from the Ginseng line. Also Home Dec. Cotton Sateen. 54". Also $7/yd.
Tossed Flowers Celery: 4 yards available Tiles Celery: 1 yards available SOLDTiles Flax: 2 yards available SOLDModern Bud flax: 3 yards available SOLDOrchid Raspberry: 3 yards available **SOLD**
Orchid Celery: 1 yards available SOLD
**btw: the cheapest I found any of this online while searching for links was $9.90 a yard (and that was for the Ritzy stuff)
You can see a couple of other things - like a pattern - for sale here and a couple other yards of fabric.
Thursday, July 16, 2009
holy destash
My son and daughter share a bedroom and I've been trying to figure out how to make their room look cute without leaning to girlie or to boyish. I think I've figured it out, but now need the money to start implementing it all. Hence, the destash. There is MUCH MORE to come, but so far here's what I've got:
Wait - first, this is how it works.
Pay me via paypal. Since the prices are freakin' awesome (lower than anywhere online) you have to pay the paypal fees ($.30 plus 3%) and the shipping.
Shipping is $4.80-$13.50 depending on how much you get (these are just flat rate shipping in the U.S). **let me know your zip code so I can figure shipping cost**
If you just get 1 yard, I'm sure I can ship it for around $3. Pattern(s) for $1.75.
If you are international, I'd love to ship to you I just have to figure out price.
Post a comment and let me know your email address and what you want (or email me at lizandrobreese@yahoo.com)
You must pay within 24 hours of me contacting you with the amount due. After that I make it available again. First come first serve.
OK... here we go...
The next 3 are all AMY BUTLER HOME DEC (cotton sateen 54/55 in.) fabric. Specifically, Nigella Wood Fern. These I saw online for $14.98 (and are now discontinued). I'm selling them for $7/yd. They are beautiful and I've had to talk myself into selling them!
3. Amy Butler Eggshell Woodfern: 1 yard available. SOLD
This one is Joel Dewberry from the Ginseng collection. (Home Dec weight 54/55 in cotton sateen). It's called Tossed Flowers in celery (also found here for $12/yd!)
There are 4 yards available. $7/yd.
Free Spirit Flower Power fat quarters. $1 each or all 5 for $3. SOLD
There will be more to come, I'm just not sure when. More Joel Dewberry Ginseng stuff and Amy Butler Nigella though...
CHECK YOUR SPAM FOLDER IN YOUR EMAIL IF YOU DON'T HEAR FROM ME. I OFTEN END UP THERE!!!
Subscribe to:
Posts (Atom)