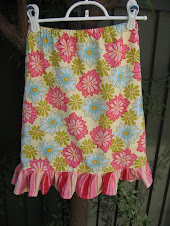
 After church on Sundays everyone comes home and takes a nap. Ahhh... it's quiet. This is my time to sew. Actually, today I sewed this headband before church and am spending the quiet time uploading pics and showing YOU how to do it. Aren't I so charitable ; ).
This is an EASY thing to make and would be a great intro-to-sewing project if you're looking to teach your child while on summer break. It also only took me 15 minutes to make and is a cheap and easy gift. Ok. Did I convince you to try it yet??
This tutorial is for a child-size headband. To make an adult one just add an inch or so to the length of each rectangle.
1. Cut 2 rectangles. The first one 5" x 16 1/2". The second one 3 1/2" x 8".
 -You'll need some elastic. 1/2" to 1" wide depending on what you just have on hand. The length will be up to you, but 3 1/2" is what I used for my DD's hair.
 2. Roll hem the long edges of the large rectangle. Technically speaking you should roll the hem 1/8" and iron then roll it again that much and iron again. But seriously... who does that? And what difference does it make?
3. Gather the short ends of the large rectangle down to 1 1/2" wide. I just sew 1 row of a longer stitch and pull the threads.
**don't forget to readjust the length back to normal after this.

4. Sew one end of the elastic on the wrong side of the gathered end of the rectangle. Fold the edges of the rectangle over the elastic (like you would a diaper) and stitch in place.
 5. Roll hem the SHORT edges of the smaller rectangle.
6. Fold the short rectangle length-wise right sides together. Stitch and then turn right-side out. Now you have a tube that will cover up the elastic on the back side.
 7. Insert elastic through tube and pull tube up over the end where the elastic is sewn into place on the large rectangle. Top stitch in place. (I like the seam to run down the center of the "wrong" side)
8. Determine the length you need the elastic to be by fitting it onto the child's head. Cut elastic to fit and then sew it onto the other end of the rectangle (gathered side) Also do the diaper-stitch (see above) to the edges of the fabric.
 9. Pull the rest of the tube over the other end of the elastic, and enough over it to hide any of the stitching and stitch in place.
 It is WIDE, but I like to scrunch it onto my daughters head so it looks gathered.


3 comments:
I can't wait to wear mine and tell everyone my great friend made it for me!!!! See my blog and my FB status for a shout out to YOU!
♥ Jen
Liz! And Tracy! I just now found your blog through a comment you left on my blog. So cool! You two are the craftiest, hippest people I know. :) I LOVE this blog. Very cute and chic. I love to sew too and will definitely be visiting often for ideas. Thanks for keeping in touch with me and Alex.
Liz- Okay, I thought these headbands were adorable but little did I know it would be soooo important to me at camp! I brought other headbands and a few bball caps. But I was getting such bad headaches up there that the only thing I could wear were YOUR headbands!!! Thank you, thank you, thank you!!! Love ya! Jen
Post a Comment