A couple of years ago my SIL was pregnant and mentioned that I should make a maternity skirt. It took a bit to figure out, but wasn't as hard as I anticipated. I have sold a couple on etsy, but have never known how they end up REALLY fitting.
I believe I am past that "oh, look how cute and pregnant you are" and to the stage of sympathetic looks and "any day now, right?" comments. I guess it does look like I have a basket ball shoved underneath there doesn't it.

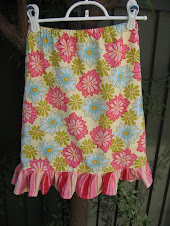
(sorry, blurry pic taken by the 6 year old)
If you are interested in making yourself one this is essentially what I did:
Supplies: thread, 2 yards cute fabric, 2 yards lining fabric, 3" wide elastic (you have to determine how much, but I buy 1 1/2 yard making a size small skirt), 1/4 yard knit fabric to coordinate w/ pretty fabric.
1. I took the Amy Butler
Barcelona skirt pattern (which I LOVE and sew all of the time when not preggo) in my regular size and traced it, front only. This works for me because I only get pregnant in the belly region (although last pregnancy my sister told me my butt looked big...), so I just use my regular size. If you tend to get pregnant everywhere, I guess go up a size.
2. I then took off 3 inches down from the waist. Save this piece (at least the measurement).
3. Cut 2 of your pattern on the fold of your outside fabric and then also your lining fabric.
4. Sew up the sides of both pieces.
5. Take the 3" waist measurement that you cut/determined in step 2. Double that length by 3" width and cut 2. Make sense??? Cut this out of the knit fabric. Sew to make one long piece. Sew those ends together making a giant loop, right sides together. Fold length of fabric in half like a hot dog, raw edges together. Iron (if it makes you feel better, I usually don't...)
6. Take your 3" elastic and cut 1/2" shorter than the length of knit you just sewed. Butt up the ends of the elastic in a loop and zigzag a million times to sew together (not overlapping, just end-to-end). Stick this elastic loop inside the knit loop you just made. Sew as close to the edge of the knit fabric against the elastic as you can (I usually move the needle to one end of the presser foot). Trim to 1/4".
7. With your pretty side fabric inside out put your lining fabric right side out INSIDE the pretty fabric. Sandwich your elastic/knit loop between the two, raw edges matching the raw edges of the skirts waist. Sew all three layers together.
8. I'm not sure how to explain the next part, but I think if you pull the lining part up, flip the pretty fabric right side out and then stuff the lining part back in so that it's on the inside, it'll all work out. If you have the AB pattern, she explains it pretty well, there's just not that 3rd elastic part.
9. Top stitch the bottom of the waist band (on pretty fabric, NOT knit fabric). Hem.
10. Wear!
Please please please - personal use only...