Showing posts with label tutorial. Show all posts

Sunday, May 30, 2010

my baby gift to you: maternity skirt

A couple of years ago my SIL was pregnant and mentioned that I should make a maternity skirt. It took a bit to figure out, but wasn't as hard as I anticipated. I have sold a couple on etsy, but have never known how they end up REALLY fitting.

I believe I am past that "oh, look how cute and pregnant you are" and to the stage of sympathetic looks and "any day now, right?" comments. I guess it does look like I have a basket ball shoved underneath there doesn't it. (sorry, blurry pic taken by the 6 year old)

If you are interested in making yourself one this is essentially what I did:

Supplies: thread, 2 yards cute fabric, 2 yards lining fabric, 3" wide elastic (you have to determine how much, but I buy 1 1/2 yard making a size small skirt), 1/4 yard knit fabric to coordinate w/ pretty fabric.

1. I took the Amy Butler Barcelona skirt pattern (which I LOVE and sew all of the time when not preggo) in my regular size and traced it, front only. This works for me because I only get pregnant in the belly region (although last pregnancy my sister told me my butt looked big...), so I just use my regular size. If you tend to get pregnant everywhere, I guess go up a size.

2. I then took off 3 inches down from the waist. Save this piece (at least the measurement).

3. Cut 2 of your pattern on the fold of your outside fabric and then also your lining fabric.

4. Sew up the sides of both pieces.

5. Take the 3" waist measurement that you cut/determined in step 2. Double that length by 3" width and cut 2. Make sense??? Cut this out of the knit fabric. Sew to make one long piece. Sew those ends together making a giant loop, right sides together. Fold length of fabric in half like a hot dog, raw edges together. Iron (if it makes you feel better, I usually don't...)

6. Take your 3" elastic and cut 1/2" shorter than the length of knit you just sewed. Butt up the ends of the elastic in a loop and zigzag a million times to sew together (not overlapping, just end-to-end). Stick this elastic loop inside the knit loop you just made. Sew as close to the edge of the knit fabric against the elastic as you can (I usually move the needle to one end of the presser foot). Trim to 1/4".

7. With your pretty side fabric inside out put your lining fabric right side out INSIDE the pretty fabric. Sandwich your elastic/knit loop between the two, raw edges matching the raw edges of the skirts waist. Sew all three layers together.

8. I'm not sure how to explain the next part, but I think if you pull the lining part up, flip the pretty fabric right side out and then stuff the lining part back in so that it's on the inside, it'll all work out. If you have the AB pattern, she explains it pretty well, there's just not that 3rd elastic part.

9. Top stitch the bottom of the waist band (on pretty fabric, NOT knit fabric). Hem.

10. Wear!

Please please please - personal use only...

Thursday, April 1, 2010

quirky cuff links tutorial

If you are a sewer/crafter I'm certain that when you look at things other people made you think to yourself "I could totally make that".

That's me.

Plus, I was "accused" by my husband a while back that I'm motivated by money. At first I was slightly insulted, but it's true and as long as money doesn't rule my life, I think it's ok. As a stay at home mom, instead of being motivated to MAKE money I seem to be motivated to SAVE money. I craft for the creative outlet, but another reason (among many) I craft is because I like to give gifts and it helps when I can give a nice handmade gift without spending lots of money. Plus, my time is priceless right ;)

Which leads me to a birthday gift for my sister's husband. I saw these Lego cuff links at a local handmade consignment shop, $25 for 1 pair, and thought of him. I also knew I could make them. Check out how easier they are:

Buy blank cuff links off Etsy here. You don't even have to buy a zillion of them. 4 pairs cost me $2.50.
Find Legos. I like these square ones, but I think the ones that are 3 nodes by 2 nodes would work too. Luckily I have a friend that has a big bin of legos that don't complete a set. She let me rummage through it to find what I wanted. $0. Maybe you could find some at a thrift shop perhaps?Super glue the lego onto the cuff link. Make sure they are going the same direction.
See, easy.

Total cost (with shipping) $4.95.

Now I guess I ought to let my sister know that she should give her husband a shirt for his Birthday that needs cuff links.

Wednesday, September 23, 2009

an apple a day...

I'm always amazed that you can actually make the treats that you see in the cute little sweet shops. Who doesn't love their apples smothered in caramel and chocolate??

While at Target I walked past a bag of Caramels. I figured I give the caramel apple a shot. I've made them with Tracy before. Ok. I watched while she made them the not-cheating way (involving a candy thermometer) and then I ate it. I was there more as moral support.

Anyway, I bought the bag of caramels thinking it would be a fun family activity. Well, it turns out - it's even fun when you're just making one. All you need is (for 1):

9 caramel squares
1/2 tbs water

melt in a small saucepan on low. Stir continuously.

Stick your Popsicle stick into the apple. Dip the apple in the caramel. You may have to roll it since you're not melting enough to technically "dip".

**don't refrigerate. It makes the caramel HARD.

Then. I melted chocolate chips in the microwave. Unless you know how to do this, Google it. It's not hard, but there is a way to make it smooth and dip-able.

Add nuts. Or candy. Or more chocolate. Or crushed pretzels. The possibilities are endless.

Wouldn't this be a fun gift for teachers? Neighbors? Co-workers? Cellophane, cute ribbon and tags? The holidays, they are a-comin'.
Now, if only I could talk him into EATING the apple and not just lick off the toppings...

Sunday, August 30, 2009

wedding gift


Don't you think cloth napkins make every meal seem a little fancier?
And if you're wondering... 1 1/2 yrds makes 9 napkins cut 14" x 14". Roll the hem. Viola - fancy.

Sunday, July 12, 2009

headband tute

After church on Sundays everyone comes home and takes a nap. Ahhh... it's quiet. This is my time to sew. Actually, today I sewed this headband before church and am spending the quiet time uploading pics and showing YOU how to do it. Aren't I so charitable ; ).

This is an EASY thing to make and would be a great intro-to-sewing project if you're looking to teach your child while on summer break. It also only took me 15 minutes to make and is a cheap and easy gift. Ok. Did I convince you to try it yet??

This tutorial is for a child-size headband. To make an adult one just add an inch or so to the length of each rectangle.

1. Cut 2 rectangles. The first one 5" x 16 1/2". The second one 3 1/2" x 8".
-You'll need some elastic. 1/2" to 1" wide depending on what you just have on hand. The length will be up to you, but 3 1/2" is what I used for my DD's hair.
2. Roll hem the long edges of the large rectangle. Technically speaking you should roll the hem 1/8" and iron then roll it again that much and iron again. But seriously... who does that? And what difference does it make?

3. Gather the short ends of the large rectangle down to 1 1/2" wide. I just sew 1 row of a longer stitch and pull the threads.

**don't forget to readjust the length back to normal after this.

4. Sew one end of the elastic on the wrong side of the gathered end of the rectangle. Fold the edges of the rectangle over the elastic (like you would a diaper) and stitch in place.5. Roll hem the SHORT edges of the smaller rectangle.


6. Fold the short rectangle length-wise right sides together. Stitch and then turn right-side out. Now you have a tube that will cover up the elastic on the back side.

7. Insert elastic through tube and pull tube up over the end where the elastic is sewn into place on the large rectangle. Top stitch in place. (I like the seam to run down the center of the "wrong" side)

8. Determine the length you need the elastic to be by fitting it onto the child's head. Cut elastic to fit and then sew it onto the other end of the rectangle (gathered side) Also do the diaper-stitch (see above) to the edges of the fabric.

9. Pull the rest of the tube over the other end of the elastic, and enough over it to hide any of the stitching and stitch in place.
It is WIDE, but I like to scrunch it onto my daughters head so it looks gathered.


Monday, January 12, 2009

tutorial: nursing cover

As a crafty (and cheap) person, when I see something I love I wonder if I could make it myself. My sister-in-law is having a baby in the next couple of weeks and I thought I'd give her a nursing cover. Have you seen them online? She's a very stealth nurser actually (unlike me who practically has to get undressed in order to nurse), and probably doesn't need one of these, but they are easy to put in the diaper bag and are convenient while in public (and MUCH easier then trying to hold a blanket down with your chin while hoping said wiggly baby makes it to the right place and no one gets flashed). Here is a tutorial for my version of a nursing cover. It's VERY easy - like a big apron.

Materials:

*36" x 30" piece of fabric (I didn't have a big enough piece, so I put another fabric with it so that the total size was right.
*2 D-rings
*Strap for D-rings is 4" by 6"
*Strap for length is 4" by however long you want.
*10" x 10" square of fabric for a pocket on the inside corner (handy for nursing pads/ binkies, etc).
*thread
*approx. 17" piece of plastic boning, maybe 1/2" wide. You can find it by the yard at Joanns. It's hard plastic that goes into corsets or lingerie. We want it curved so that mom can see baby.

Step 1a: Cut your fabric. If you have to use two pieces like me, sew them right sides together, and then sew the seam up towards the top piece on the wrong side.

Step 1b: Serge all sides of your large piece. If you don't have a serger you'll be rolling the hem later in a couple of steps.

Step 2: take the 10" x 10" square and fold it in half (wrong sides together) to make a triangle. Sew a line across the length of the folded edge.

Step 3: Pin triangle in the bottom corner of the wrong side of the fabric. Leave enough space for your rolled/serged hem to go over the edge of the triangle.

Step 4: Roll hem (or fold over if serged) on the bottom and sides.

Step 5: Make straps. Sew each one wrong side together lengthwise. Flip right-side out. On the longest strap tuck the ends into itself and sew across. On the short one thread the D-rings on and then sew across the strap close to the rings to keep them in place. Serge or Pink raw edge of strap.
Step 6: Put the straps on the fabric. With large piece wrong side up measure in 12 inches on each side. Make sure you've rolled your hem or folded it down if serged. This is where you'll place the outside edge of the straps. Pin them in place. On one side, sew from the edge of the large piece to over the edge of the first strap. Then, move over approx. 1 inch and sew to the other edge (going over the second strap) This makes a casing for the boning.

Step 7: To stabilize the straps and make it easier for the next step, sew a square at the bottom of each strap.

Step 8: Insert the boning. The boning has a curve in it so that it's easy for mom to view the baby. Make sure the curve makes the fabric stick out in the right direction (visualize mom wearing it and it sticking out AWAY from her). Slide it in until it hits the other strap. You may have to clip the boning to make it shorter. Sew the opening closed. I also sewed close to the top all the way across in hopes that the boning won't twist around when washed. Plus, it looks nice.
Viola: baby gift.

Thursday, November 6, 2008

tutorial: covered button ponytail holder

This tutorial is probably unnecessary because it's pretty simple. I figured out a newer faster way to do it than the way I had originally been doing it, so I thought I'd share. I bought thin ponytail holders and a covered button kit that has 1 1/2" buttons. Any size button will do though. Then you need a strong piece of string.

Wrap your string around the elastic and insert it through the back of the button shank loop thing. Pull
Then Knot
Follow the directions on the box to cover the button. On the bigger buttons you can put a layer of muslin in between the button and the cute fabric. I highly recommend doing this so that the metal doesn't shine through the fabric. (I tried doing this on the smaller buttons, but it doesn't seem to work - too thick.)These make great, inexpensive gifts (especially if you can use a coupon at Joanns or check on etsy. Beware: these are very addicting to make!

Wednesday, October 8, 2008

crafty cork board

I had never considered myself "crafty" until this project. Perhaps being "crafty" has held a stigma of my mom and aunt toll painting cutesy pumpkins and other Relief Society-making-wreaths-out-of-garden hoses type projects. But, now I give in. I'm crafty and that's ok dang it.

I've been on the hunt a while now for a cute cork board or magnet board that I can put in my laundry room to post notes on (or more likely stuff I want).

Anyway, the space that I wanted to put it in was sort of limited so I decided to make my own. Walmart sells a 4 pack of cork board squares that are 12 x 12 (but they are pretty thin) for only $5. I wanted them to be thick as if they were on a canvas so I decided to hot glue 3 of them together. (Also, one is too thin to use - the pin would just hit the wall).

Here's how I did it. It's so easy I'm not really sure that a tutorial is necessary but what the heck.

1. Hot glue the cork board together. I did 3.

2. Cut fabric 16 x 16. I also cut out a piece of muslin to put in between the fabric and the cork board so the cork board wouldn't show through. Don't forget to iron your fabric.

3. Layer the fabric (wrong side up), muslin, and then cork board and pin up two (opposite) sides. I just used push pins to stick the fabric down so I could use the fabric again and switch out the fabric when I wanted to.


4. Fold up the other two sides. The easiest way to explain how to do this and have nice corners is to fold up the ends like you do when you wrap a gift - except fold that top flap towards the board with the bottom flap following.

5. Make sure everything is pulled nice and tight.
Viola - you're done. I covered some buttons and hot glued them onto push pins so the pins were cute too.


edit:: I should have put on here what I did to hang mine. Sorry for those of you that have had their boards fall off their walls (and then destroyed by their toddlers). I just hot-glued a picture hanging hook to the back of it.

Sunday, September 28, 2008

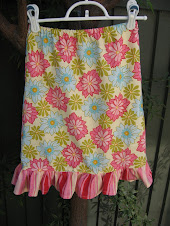
a-line skirt especial

This is the first tutorial I've ever written and I'm trying to figure it all out. So, at the moment, at the bottom of the tutorial is an entire sections to print the pattern from. I'm hoping to create a link that automatically just downloads it on your computer, but until then. . .

Introducing the A-line skirt Especial sizes 3-8. It takes about 1/2 yard of main fabric and 8 inches more of a contrasting fabric if you want to add a ruffle.

Step One: Print pattern and tape pages together. There are 3 pages then end up in an "L" shape. Match up all of the lines before you tape the pages together.
Find your size and cut.

Step 2: Cut 2 pieces on fold.


Step 4: If you don't want to add a ruffle - then you're nearly done. Sew up both side seams (wrong sides together of course), hem, sew a casing and insert elastic. Easy peasy lemon squeazy.

It would be cute to add a sweet little trim with bias tape to the bottom too as an idea.

If you want to add a contrasting ruffle then here are the rest of the instructions:

Cut two pieces of fabric 4 inches wide by double the width of the bottom of the skirt.

Step 5: Sew the two pieces of the skirt ruffle together, wrong sides together. Hem. Lengthen your stitch length and sew a gather stitch at the top. If you don't now how to gather here's a good tutorial on this blog. Make sure you readjust the stitch length before you continue.
Step 6: Put right side of the skirt together and sew up ONE side.


Step 7: Gather ruffle and pin right sides together to the skirt. Match the seam of the ruffle to the seam of the skirt. Sew. Turn skirt with wrong side facing up, fold up the ruffle seam so it lays against the body of the skirt. Stitch down. This creates a top stitch on the other side that looks really nice, and helps the ruffle hang straight down.

Step 8: Sew up the other side of the skirt (wrong sides together of course).


Step 9: Measure your child's waist and cut the elastic 1/2" longer. Make the casing for the skirt a bit wider than the elastic. I used 1/2" elastic. Insert elastic into the casing, sew the ends of the elastic together, and sew up the opening.


And you're finished. Now find a cute matching shirt - or maybe do some cute applique on a shirt to match from your scraps.

Here's the pattern pieces for you to print (to print put your cursor over the "iPaper" at the top left of the screen):